Three Ways to Install OpenClaw (and Why You Might Choose Each)
Official documentation for all of these methods lives here:
https://docs.openclaw.ai/install
The Big Picture (10,000-Foot View)
At a distance, the three installation methods differ along a few core axes:
- Convenience vs. control — how quickly you can get running versus how much you can inspect or customize.
- Trust surface — how much you rely on prebuilt artifacts versus source code you can audit.
- Isolation — whether OpenClaw shares system dependencies or lives in its own sandbox.
- Update strategy — automatic, semi-automatic, or fully manual.
All three methods run the same OpenClaw software and share the same runtime state (agents, credentials, workspace). What changes is how the code itself gets onto your machine and how it’s updated over time.
The Three Installation Methods
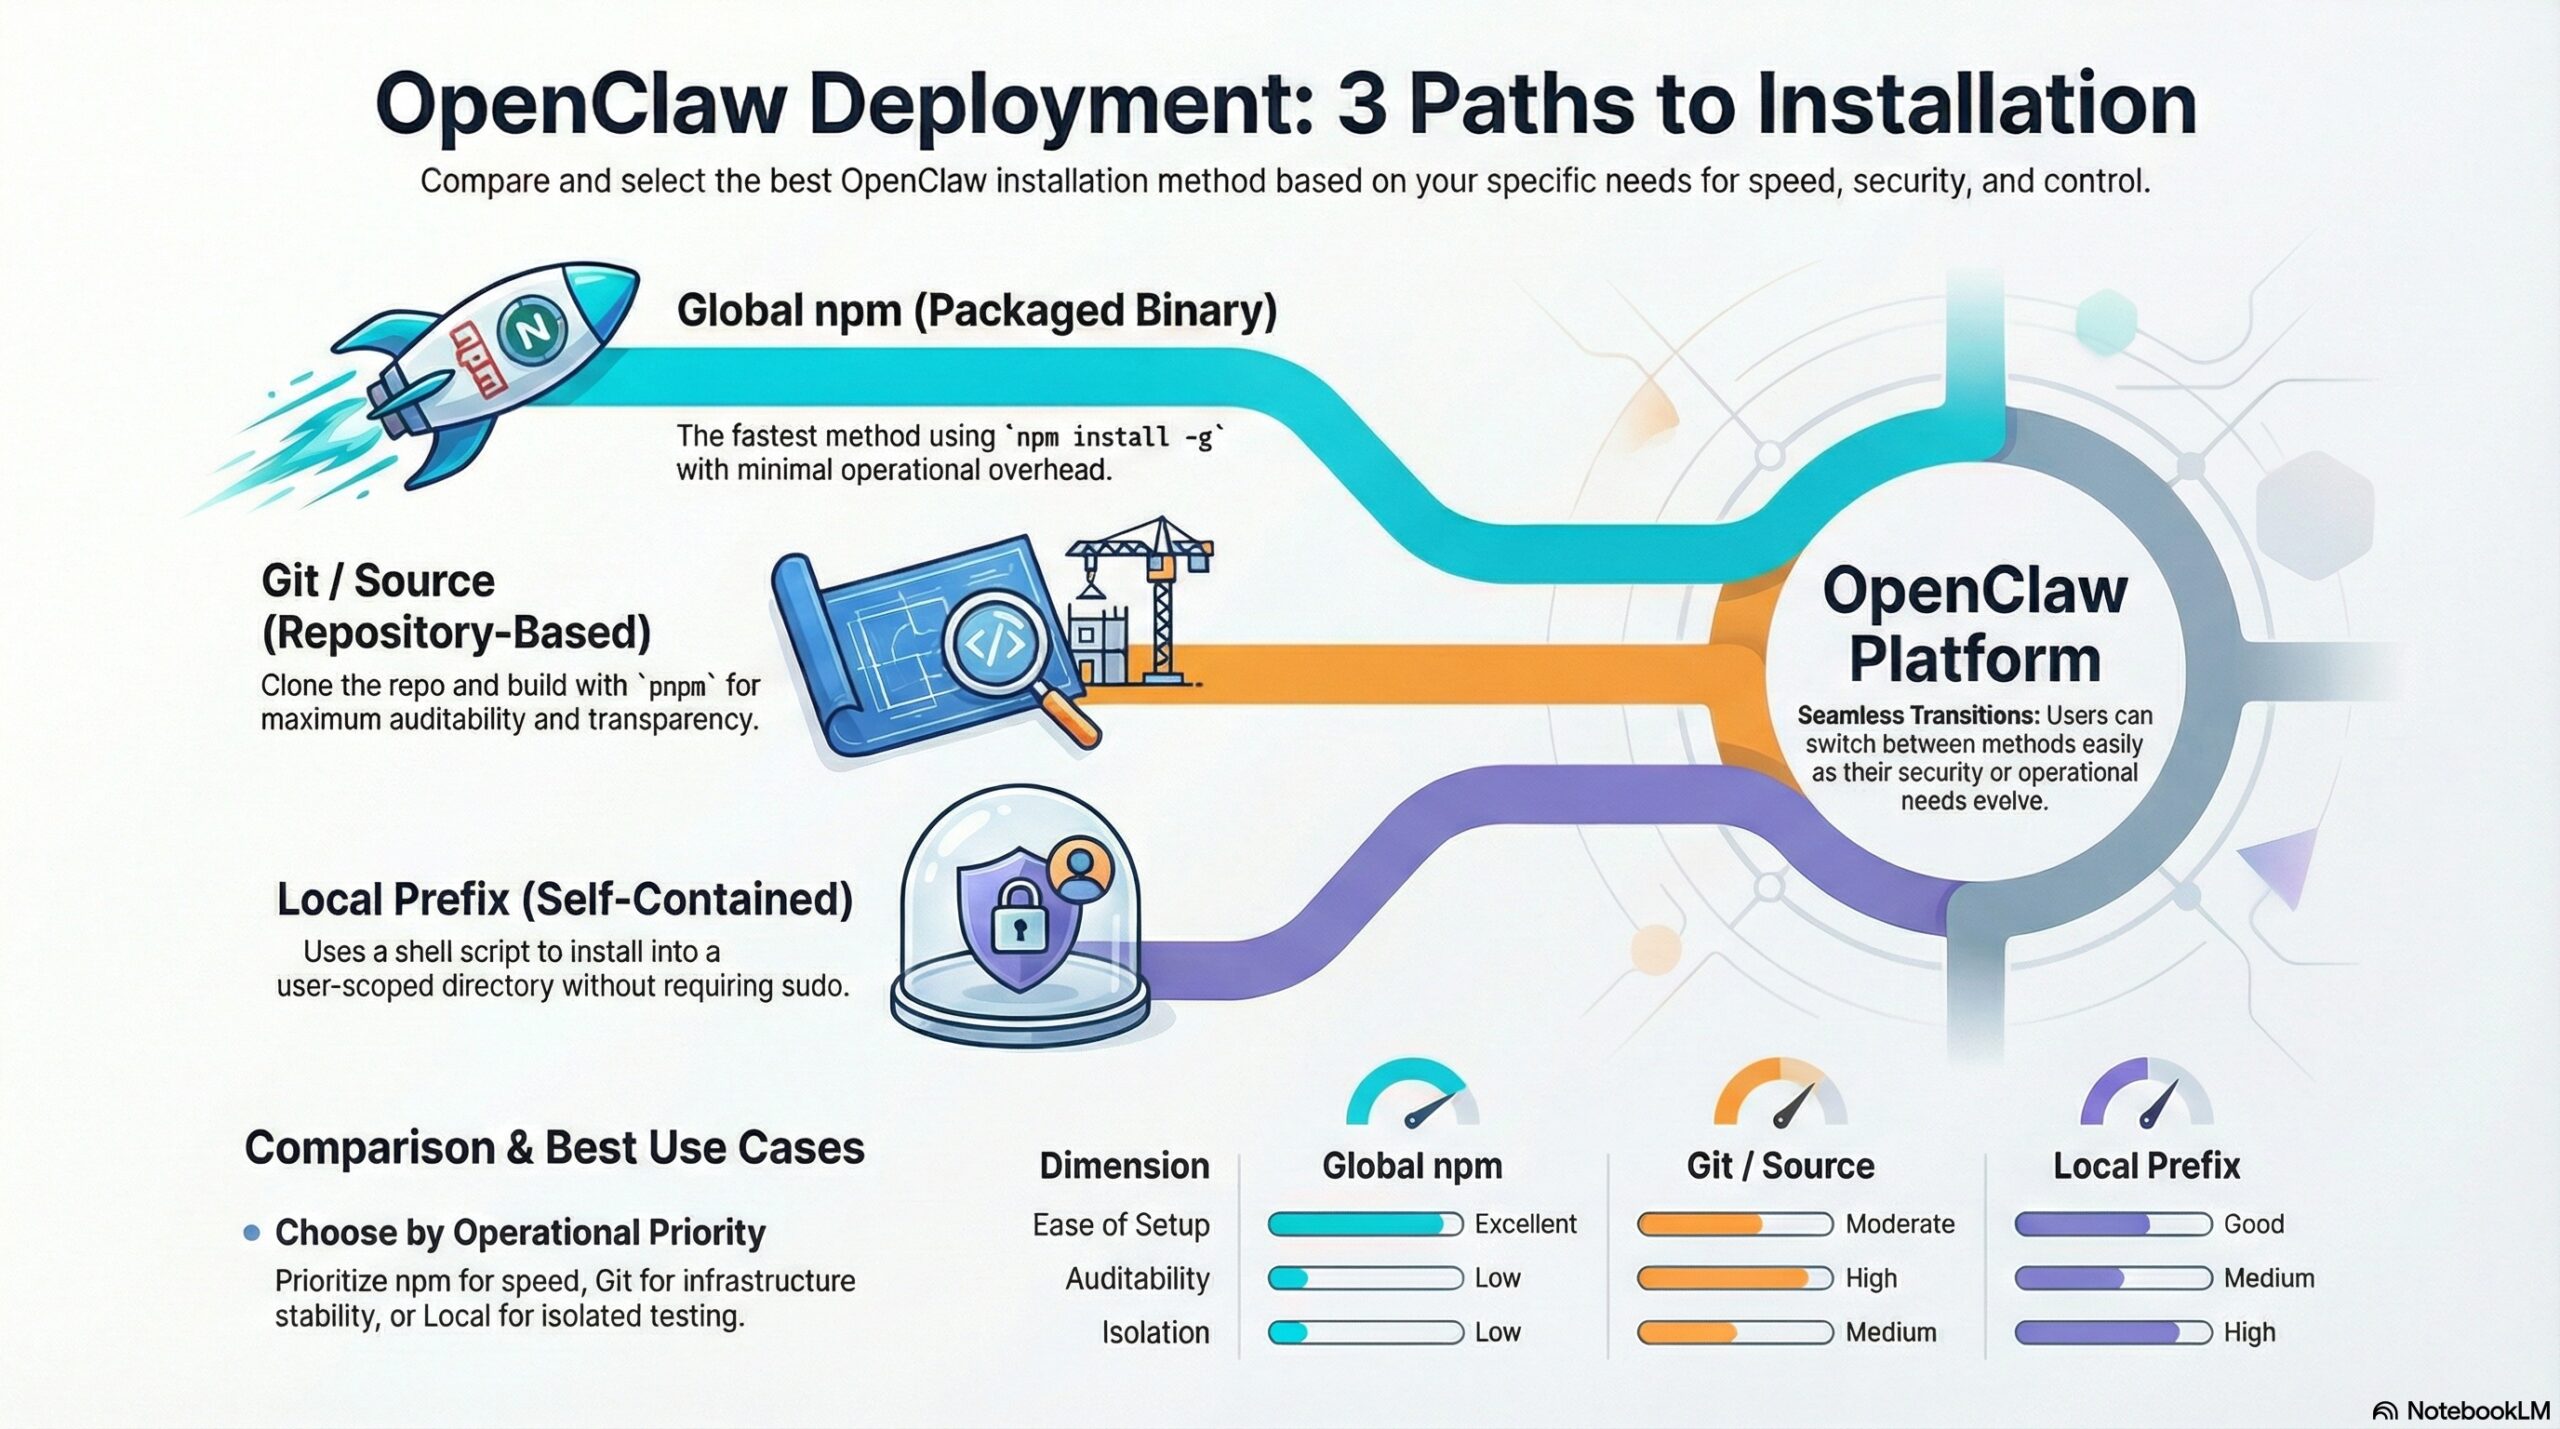
1. Global npm Install (Packaged Binary)
This is the most straightforward approach. OpenClaw is installed globally from the npm registry using a system Node.js runtime:
npm install -g openclawUnder the hood, this pulls a prebuilt OpenClaw package and installs a global CLI wrapper (typically under /usr/bin). Updates are performed by reinstalling or upgrading the npm package.
Key characteristics:
- Fastest to install and upgrade
- No build step
- Relies on the npm registry and system Node
- Very low operational overhead
2. Git / Source Install (Repository-Based Build)
In this method, you clone the OpenClaw repository directly and build it from source using pnpm:
git clone https://github.com/openclaw/openclaw
cd openclaw
pnpm install
pnpm build
A small wrapper script points the OpenClaw CLI and systemd service at the built artifacts in your local checkout. Updates are managed via Git (pulling commits or checking out release tags).
Key characteristics:
- Full access to source code
- Explicit build step
- Supports pinning to tags or commits
- Higher transparency and auditability
3. Local Prefix / Self-Contained Install (install-cli.sh)
This option installs OpenClaw into a user-scoped directory (default ~/.openclaw), optionally bundling its own Node.js runtime:
curl -fsSL https://openclaw.ai/install-cli.sh | bashThe result is a self-contained OpenClaw installation that doesn’t rely on system Node or global packages. Everything lives under your home directory.
Key characteristics:
- No sudo required
- Good runtime isolation
- Moderate transparency (script-driven)
- Convenient for local or constrained environments
Comparing the Methods
| Dimension | Global npm | Git / Source | Local Prefix |
|---|---|---|---|
| Ease of setup | Excellent | Moderate | Good |
| Auditability | Low | High | Medium |
| Isolation | Low | Medium | High |
| Update control | Package-based | Git-based | Script-based |
| Operational overhead | Minimal | Highest | Low–Medium |
Which One Should You Choose?
Here’s an opinionated—but practical—way to think about it:
- Choose Global npm if you want the fastest path to a working OpenClaw instance, you trust the registry, and the machine is single-purpose or tightly locked down.
- Choose Git / Source if you care about supply-chain transparency, want deterministic upgrades, or run OpenClaw as long-lived infrastructure where predictability matters more than convenience.
- Choose Local Prefix if you want isolation without Docker, no system modifications, or a clean self-contained setup for local testing or controlled environments.
The important thing is that OpenClaw makes switching between these approaches relatively painless. You’re not locked in—you can start simple and move toward more control as your needs evolve.
In practice, that flexibility is one of OpenClaw’s quiet strengths.
“`